My Favorite Books

Wednesday, February 10, 2021

Snow Dyeing Time!

 Well, what else do you do with all that snow when you live in Michigan!  We've normally been in Florida so I've only done ice dyeing and not snow dyeing.  I have to say this was fun and I'm happy with my results!  


I did the 'normal' placing snow and then sprinkle dye powder on top of the snow for the first method.  

The second method, which I just happened to have a bookmark on snow dyeing from Tamarack Shack,   Kathy fills small ice cream containers with snow then mixed each color of dye powder in the containers.  She would then scoop the dyed snow on top of her soda ash soaked fabrics!  


I started with laying some of the purple snow/dye mix on top of the soda ash soaked fabric.


Then I added the yellow and green.


To be honest, I was hoping I would get some brown pieces of dyed fabric.  Hmmmmmmm  


I used Blue Violet, Bright yellow and Chartreuse for the center/snow & dye mix.

Bottom tray was Lime, Robin Egg and Periwinkle.

Top tray is Red Wine, Bright Green and Bright Yellow.


Some of my  best results...


You can see my Kalee girl sniffing the fabrics in the pic above!  She loves the snow!

I believe this was the mix of....oh heck, I don't know!!  HA  But I really liked it.


I have two pieces similar and they are quite brighter than what shows in this piece.


Yep, I had two pieces similar..the dark areas are actually green black.  Really a nice piece.


I do know this was the snow/dye powder mix.  You don't get the intensity, at least I didn't.


Again, the dye powder/snow mix.  This was a piece that I did rubbings using Gelato's.  You can see the original piece before I dyed it below.  I should have left it alone.  HA


This was a cool piece but I always wanted to over dye it.  I just didn't think it would cover so much of the leaf rubbing.

You can barely see the design unless you're looking closely.  But that's ok.  It's still a good piece of fabric that I'm sure I can use at some point.  

I am working on playing with some of the fabric and cutting out a floral design.  Back to the old days of doing some traditional type work.  

Oh, had my MRI finally...yep, complete tear of rotator cuff...ugh...I see the ortho dr next week.  I don't want surgery and hoping this Dr. will have some other alternative.  Some tears will heal...some require surgery...Here's my final report: Double UGH!!!!!


Saturday, February 6, 2021

Magic Cross Stitch - final - sorta!


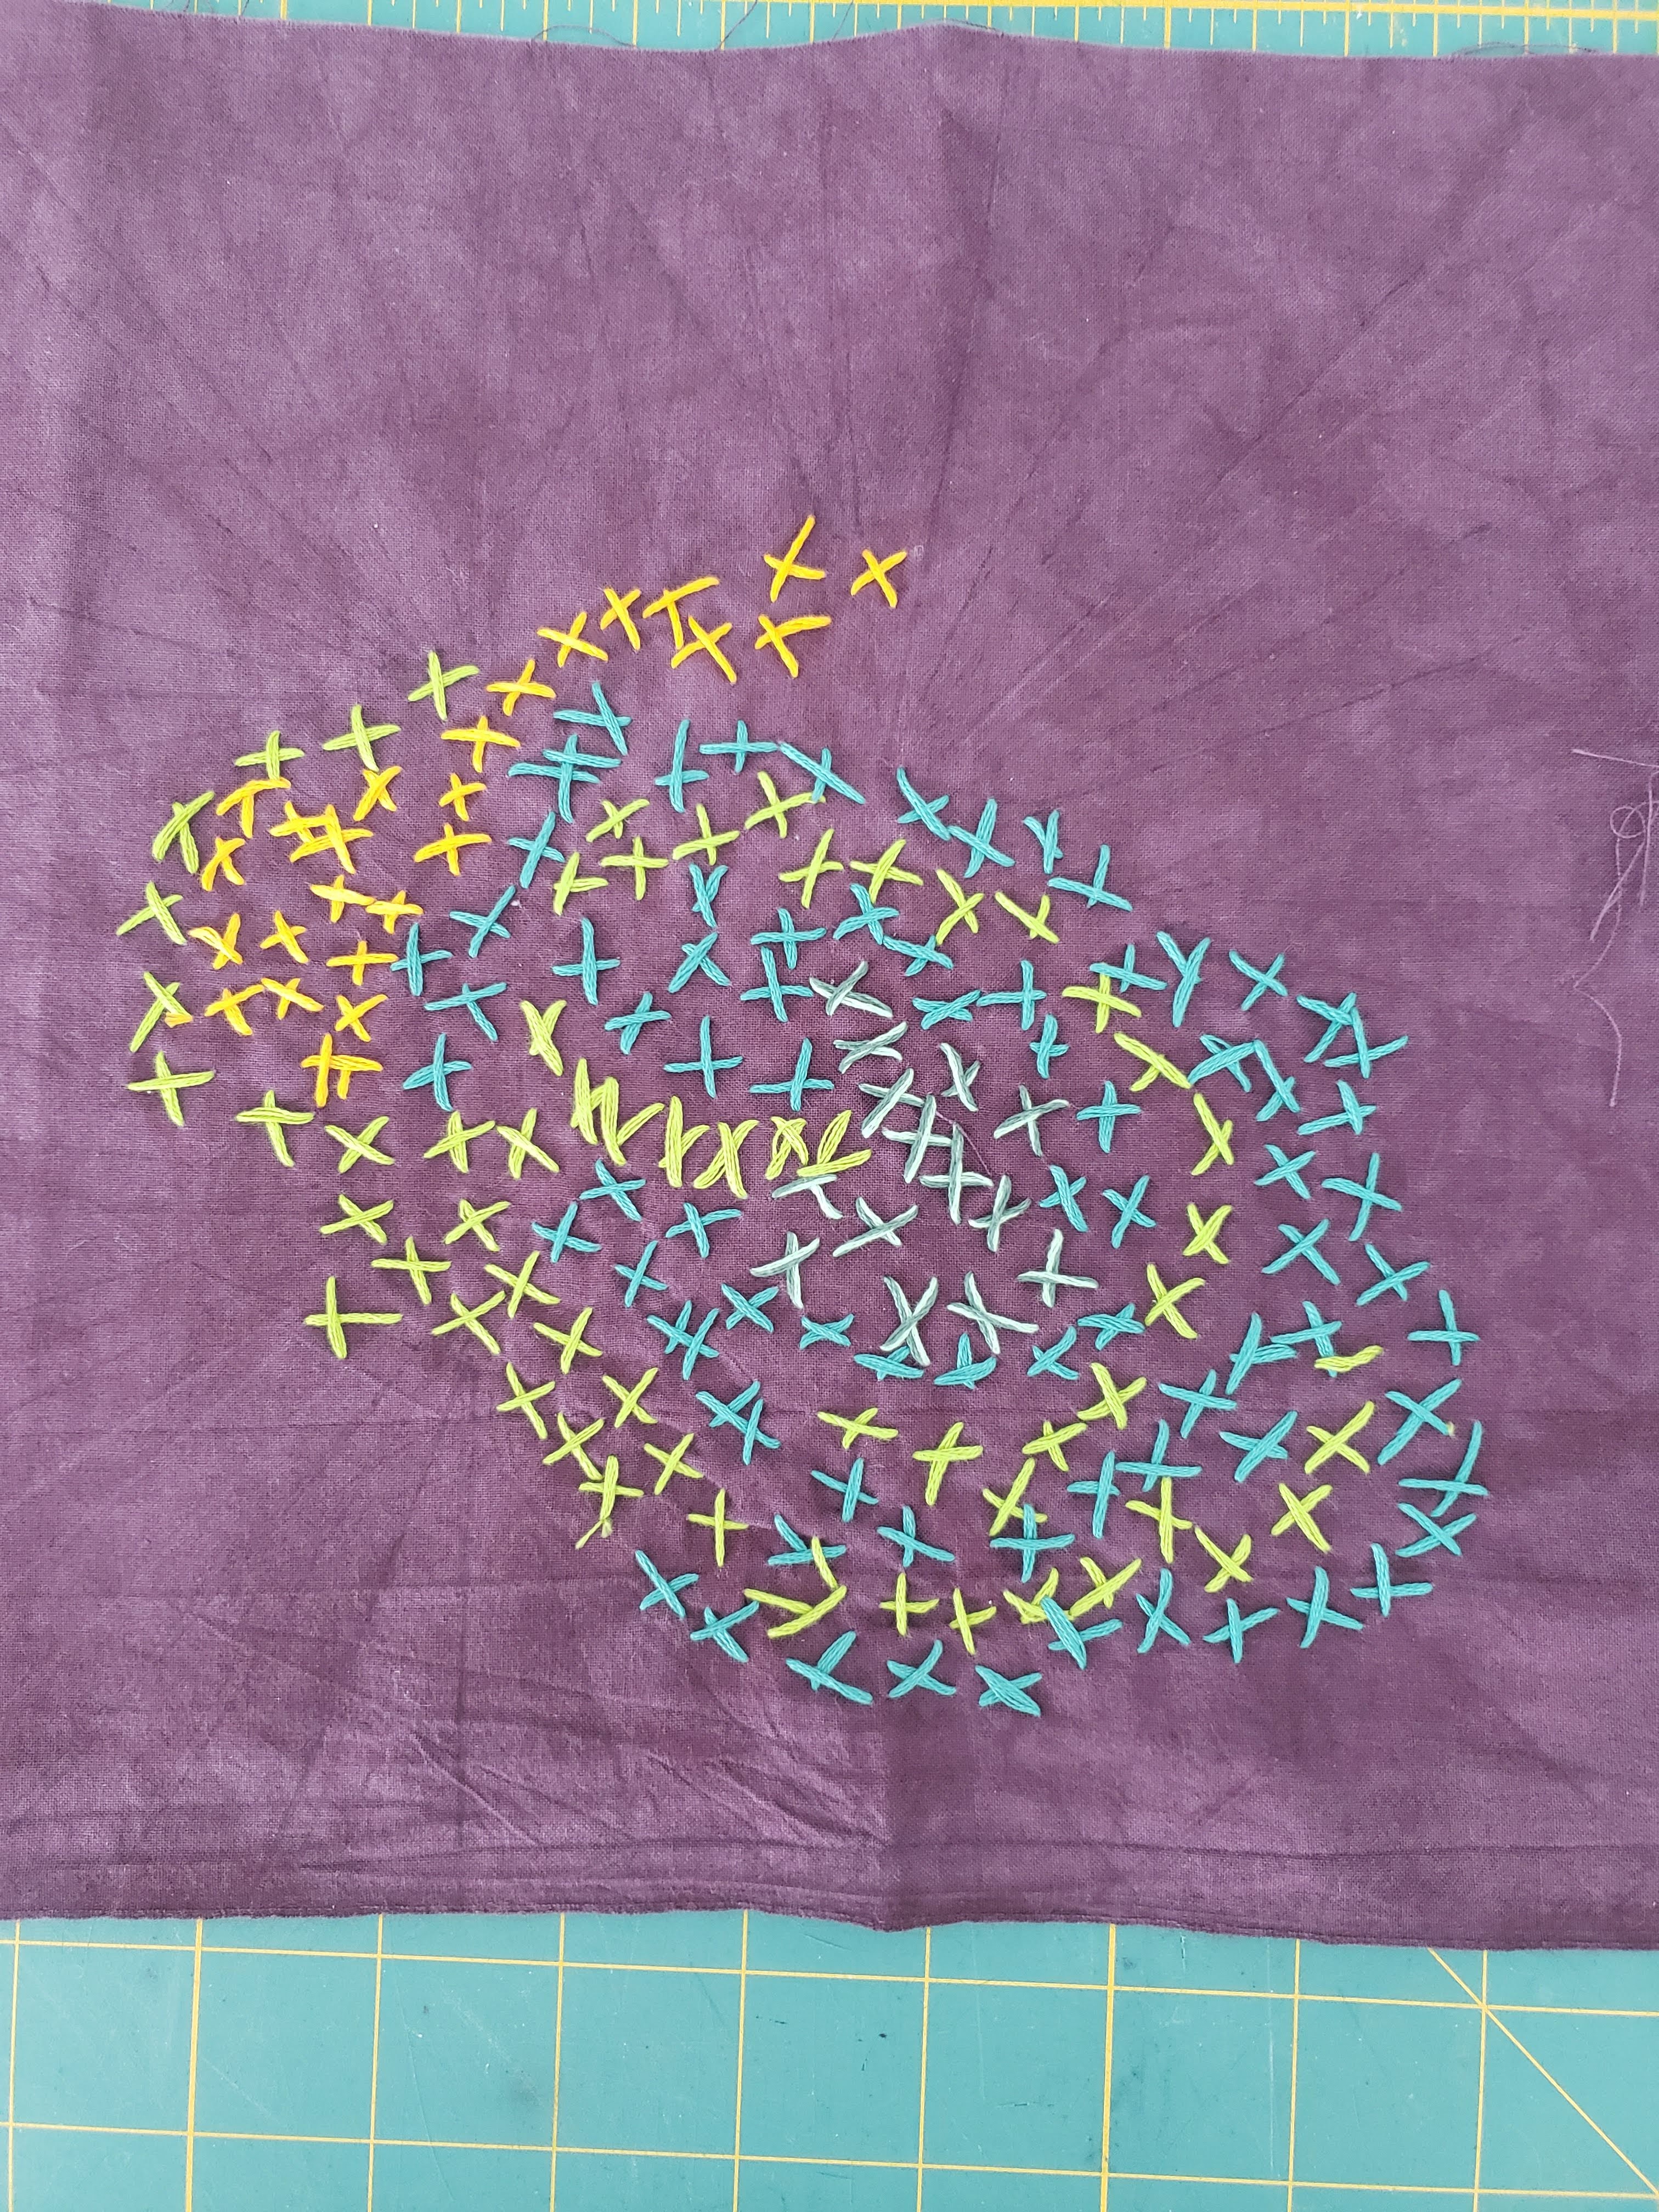
 I posted last week on Kathy Loomis' 'magic cross stitch' process that she posted on her blog (Art With a Needle) a few weeks ago.  I also did a blog post on my first few attempts at using Kathy's method.  This past week I finished a small piece (11"x11").  Here again, is my start to finish!


I found that the embroidery method of stripping your threads and putting back together didn't seem to work very well for my cross stitching.  You can see how loose the yellow threads are vs the green, which I just used the six strands of embroidery thread as is.


So I started Kathy's cross stitching...it's not your standard 'cross stitch'...don't ask...just buy Kathy's tutorial!  HA


Pretty much finished but needed more so.............


I added more cross stitching, which the 'pink' color is actually orange! And then just straight stitching around the piece.

Not sure what I'll do with this piece but at least I gave it a go and have in my embroidery tool box!  Something to keep in mind for future projects if you are looking at creating a different background for your work.  Always good to learn something new!  Thanks again, Kathy, for a very detailed tutorial for your 'magic cross stitch' process!  

Saturday, January 30, 2021

It's not my fault!

 That's right!  It's not my fault that I'm interrupting my mono printing, knitting, collage work...I'm going to blame this latest technique to 'play with' on Kathy Loomis from Art With A Needle!  A few weeks ago, Kathy did a post about learning a "magic cross stitch".   Isn't it cool!

Magic Cross Stitch by Kathy Loomis

Sounds simple doesn't it!  Who doesn't know how to make a cross stitch!  Kathy has taught this class in person but also put together a 50 page tutorial you could purchase on how she does the "magic cross stitch".  So guess who purchased the tutorial!  Yep...you see it's all Kathy's fault!  

I have to say when I first started out stitching her technique/tutorial, I had a few 'right brain/left brain' confusion episodes!  But Kathy shows how to do this random stitching in a unique way, which I finally got it (well, most of the time!)!  I really think it's quite clever, even though the process is quite simple.  


So, I started...first I was trying to find the cotton/linen fabric to stitch on...I was anxious to get started (yep, just like a kid!) so I grabbed one of my previous stamped/overdyed pieces.  I haven't asked Kathy about this yet, but whenever I use embroidery thread(s), I always separate them and then place back together to stitch with.  I did notice my stitches were really loose/separated (see pink circle area) so I just started stitching with the six strands and not separate them.  

This was just to get used to the stitchin technique...no, I'm not going to finish this.  It was just a snip of fabric to play with.


Here was my start...actually, the background fabric is a deep purple.  It's Cherrywood fabric that I purchased several, several, several! years ago at Huston IQA show!  I tried to alter the color to what it really looks like but no success.  


I have a ways to go filling in more cross stitches on this piece.  I'm not adding to fill in the entire piece only more cross stitches on top of what I have.  It's hard to see but I have placed diagonal lines extending from the cross stitching.  I'll be doing either stab hand stitching (sorry, Kathy!  HA) or free motion.  

My readers  know I get bored easily so of course I had to start another piece before this one is finished!  HA


This is a strip of mottled black fabric that I stitched grid lines with straight stitch (I plan on stab stitching heavy threads on the grid line after finishing each square).  


This is the back of the fabric.


And so I started.......I am not sure what other color of thread I will use for the alternate squares...at this point, I don't want to stitch white in each square (which are 2"x2").  


And this is as far as I've stitched.....what will I do with this piece of the other piece?  Who knows...but they will find a way in my art work or perhaps even in a fiber card or two!


Thanks, Kathy for a new technique to add to my 'tool box'...even though it's overflowing with techniques, this is one I'll keep!

Tuesday, January 26, 2021

Boring I know - More Mono Printing!


 Yep...more mono printing!  A gal has to keep busy, right!  And I haven't decided on my next knitting project yet, so...I have to play, right! 

This is the piece I showed in my last mono print blog post. 


I've added a strip at the top and started to fill in the the tree trunk the little bird is attached to.  So interesting, very few have noticed the little bird on the bottom!  HA  I found this picture in the Bird and Bloom magazine and thought he would fit!

Now to add stitching...the papers are fused on a piece of batting (12"x12").  


These are some other mono prints I did using layering technique and ghost prints.  I really like how they  each turned out.


For my next collage I used the print above (on the left) and part of the print, on the right, in this picture.


The orange strip(s) are from some older papers I've printed last summer or maybe the summer before!  HA


I'm happy with how this one turned out.  Again, I need to think about stitching or whatever!  This one is 9"x10", again, fused on a piece of batting.


Today we're enjoying some time inside...what a unique idea!  HA  Snow started around 5 a.m. and we've received about 2 inches...it should taper off by afternoon so we'll just enjoy the beauty of a Michigan winter from inside our house! 


Friday, January 22, 2021

More Mono Printing


Still playing around with more mono prints.  I like the black printed piece I stenciled last summer and looking at it closer noticed some pale blue throughout. 

So...it didn't seem like enough blue so I overdyed with some Robin Egg Blue dye by just painting the liquid dye on the cloth.  I wanted to use this piece as a background for a new collage I started to work on but I just couldn't get it to work out...too busy of a piece but I still like it and I will use it somewhere.   

But check out the Botanical stem stencil that I printed in the middle.  It's a stencil by Mary Beth Shaw and I really love it.  It's 9"x12" and a perfect size.


This was a ghost print on deli paper after I printed some layers using the gelli plate.


The prints on the sides were from using up any paint on my gelli plate.


Sorry...forgot to turn the picture...birds of course!  HA  

I used the original mono print of the Botanical Stem above to be the focal point for this  collage.  You can see where I used some of the bird stencil prints and ghost prints as well.

I added a picture from my Birds & Bloom magazine to the bottom right.  He just seemed to fit.  

I still need to blend some of the hard edges as well as extend or outline the stems.  The print is brighter than what's showing in the picture...you can see the 'real' color in the first picture on this post.  Hopefully, when it's finished it will look deeper when I photograph it! 

Instead of putting this collage on a canvas (because I didn't have any!) I just fused to some batting.  I'll be machine and hand stitching so this works better for me.  Too hard for me to stitch through canvas.  Now on to the next collage.  

Tuesday, January 19, 2021

Some Mono Printing


 These are some of my mono prints from this week using the Gelli plate.  I had some papers previously printed that I wanted something on the backs of them.  Good way to play and practice.  I just used any acrylic paint or Set-a-color opaque paint to print with.

This was a ghost print from the one below that I ended up adding some painted bubble wrap and paint.


The first print was for the feathers outline..then I painted over a ghost print from another print!  You can see what it looked like in the second pic below before I added the blue print.


This was a ghost print from the print below.


A before print (see 2nd pic above for the finished pics).  I downloaded some out of order and too lazy to reload!  :)


Nothing great...just some bubble wrap and smearing from leftover plate on the gelli plate.


Had to use up the pink paint!


I love working with feathers on the gelli plate!


I took the wet feathers from the print above and laid on top of the white feathers...putting them a little off center of each feather.


  The first print with the feathers 


And, again, took the feathers and laid on top of the papers and printed.


The feather ones turned out really nice!  These are all 8"x10"


Just playing with leftover paints and feathers!  Fun hour or two and the backs of my papers have some cool designs printed on them.