I last posted on arranging the painted paper behind the background fabric for my 3rd horse piece. I got thinking that I might run into a problem with stitching over the paper so decided to put my thinking cap on (it took me awhile to find it!) and figure out a way to make the paper flexible or at least ready for stitching. Awhile back, I took a Zoom class from
Margarita Korioth on using paper in our quilts. I vaguely remembered the process and had to review! Thank goodness I kept notes! HA
So, what to do but make a test sample! Out came some pieces of painted papers, fusible web (Misty Fuse), fusible lightweight interfacing, cheesecloth and batting/fabric. I started off by putting Misty Fuse on the back of my painted paper. Then I laid down interfacing and put the cheesecloth on top and fused together. Next, I laid the paper (with Misty Fuse on) and fused those together (cheesecloth & paper). Woohoo...it worked..the paper was flexible and not as stiff as it was. This isn't quite the same method Margarita used but gave me enough ideas on how to apply her thought process to my piece!
Next up, I wanted to make sure I could stitch through the paper, batting and background fabric easily. So I cut out a small area on this painted/dyed fabric (I did add Misty Fuse to it before I cut out the rectangle). Laid a piece of the painted paper under the opening and fused to a piece of batting. I did some stitching around both paper and background and it worked great!
BUT, then I got looking at the background piece and I didn't think it had enough color in it. I'll be doing some free motion quilting but still thought it needed some more color.
Back to the dye room to find some paint to match the existing 'goldish' dye. I have no idea what dye mix I used when I originally made this piece of fabric. I did have the oval plastic pieces so it was pretty easy to paint more ovals on.
I also stamped some of the small stripes. I'll be doing some hand embroidery on those as well as adding some tiny strips of the horse papers! Just to add some color to the background. Well, that's my thought process so far!
This isn't the final placement for the paper behind the background.. I just forgot to take a picture before I fused and too lazy to do it now! I had to play around with moving the paper and then marked around the edges with 1/2 to 1" excess and cut out a funky horse shape. HA Then I fused the background fabric to the horse paper cut out. I had Misty Fuse on my background fabric too. So now I'll do some stitching to hold the paper to the fabric. Stay tuned for part 3!
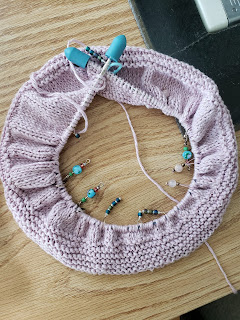
And I have started on knitting the summer tee! WHEW! Long way to go but I may finish before winter! Good project to work on while Bob watches baseball at night!


The paper on fabric is interesting! How heavy and what type of paper did you use?
ReplyDeleteYou punched up the background nicely. And look how much you've done on your knitting already! Summer tee..... you might just make it!
ReplyDelete